Showing posts with label UE4. Show all posts

Thursday, 28 July 2016

1920's Speakeasy Environment - Part 8

1920's Speakeasy Environment - Part 8

I've been making some good progress on my speakeasy environment project lately, steadily creating more and more models and doing at least an hours work each day. Over the past few days I've created some wooden beams, a stool model and a new floor for the room which includes a basic placeholder wood texture. I'm pretty happy with how its going.

This week I am planning to start developing the textures of the existing models and also to continue creating new models.

Here's how the scene is looking now.


Wednesday, 20 July 2016

1920's Speakeasy Environment - Part 7

1920's Speakeasy Environment - Part 7

This week, I've been working hard on my latest 3D models for my speakeasy scene which includes the tables and booths pictured in my blog post last week

Having suffered from a rather inconvenient lack of motivation and free time in recent weeks and months, my work on this scene has been very "stop-and-start", but I've knuckled down recently and have been doing at least 1 hour of 3D work every day for about the last 10 days, on top of my full time QA job. This has been tiring but feels very rewarding and my scene is starting to progress more and more.

My latest work includes the creation of a few furniture items for my scene which I have fully modelled in Maya, UV mapped, generated normal maps for and applied basic block-colour textures to. I have also imported them into the scene to see how it looks, and also to spur me on to keep up my momentum on this project - I find it motivates me to see my new 3D models in-situe by helping me envision the final product.

Next, I need to finish off a few architectural pieces such as the floor which is currently just a plane with a diffuse map. Once the architecture is done I can really begin to fill the scene with props. Here's some pictures of the current scene in UE4.


Tuesday, 15 March 2016

1920's Speakeasy Environment - Part 6

1920's Speakeasy Environment - Part 6

Another speakeasy update coming your way! Today I finished the Tommy Gun 3D model and its now fully PBR textured with diffuse, normal, roughness and metallic maps. I'm quite happy with how its turned out and I'm calling it finished for now, but I might tweak a few things further down the line.

Some info on the tommy gun: I originally planned on modelling it with the typical drum magazine as seen in many classic gangster films, but I wasn't happy with it so I decided to make a box magazine and was instantly happier with it so I stook with it. It's based on a 1928 Navy model which DID have the box magazines and top-mounted bolt and ejector port so it's still fairly accurate and viable for it to exist within the scene. I included some writing on the side that is based on real features of the 1928 model Thompson. I also made it so the serial number had been scratched off - implying this particular weapon was stolen from its original owner.

This was one of the most important models of the scene so it feels good to have it done. It is the 3rd gun I have fully modelled and textured. Here's some pictures:


My next step is to continue with the architectural pieces.... like I was doing before I got carried away with doing the tommy gun!

Thursday, 10 March 2016

1920's Speakeasy Environment - Part 4

1920's Speakeasy Environment - Part 4

I've made some more progress on my speakeasy environment. It's slow but steady at the moment; I've just been modelling architectural pieces and making a few prototype textures. I've recently finished up a door (that I've also textured), and the arches.

Here's a few pictures of how the scene is looking:


Monday, 7 March 2016

1920's Speakeasy Environment - Dev Diary Part 3

1920's Speakeasy Environment - Dev Diary Part 3

Day Three of my latest environment art project and things are continuing to go well. Having blocked-out and planned the scene on day 1 and day 2, today I started the real work of making the architecture of the room itself - specifically, the walls.

I spent about 8 hours modelling a big, chunky, modular brick wall and baking a normal map in Maya, and I also started to texture the wall too. By the end of the day I've finished the model and got a (placeholder) diffuse, normal, specular and roughness map applied to the model in UE4. It's not finished yet but its a good start!

Here's some pictures:


Next step: finish off the wall and start work on the arches, floor and other architecture.

Sunday, 6 March 2016

1920s Speakeasy Environment - Dev Diary Part 2

1920's Speakeasy Environment - Dev Diary Part 2

It's day two of my new 3D environment project and I've started 3D modelling the basic architecture of the scene in Maya. I made a basic blockout and imported it into UE4 so I could explore it in 3D and make sure I was happy with the scale and layout of the scene before moving on.
Here's some pictures of the work I've done today:


I'm happy with the layout and scale of the scene. My next step is to keep working on the architectural assets that make up the room.


Saturday, 5 March 2016

1920s Speakeasy Environment - Dev Diary Part 1

1920's Speakeasy Environment - Development Diary Part 1
  
I've started working on a new 3D scene this week. I'm going to make a 1920's prohibition bar/speakeasy/jazz club scene, inspired by 1920's nightlife and mafia culture. So far, I've drawn up some very rough concepts and layouts for the scene and created a 3D blockout using Google Sketchup.

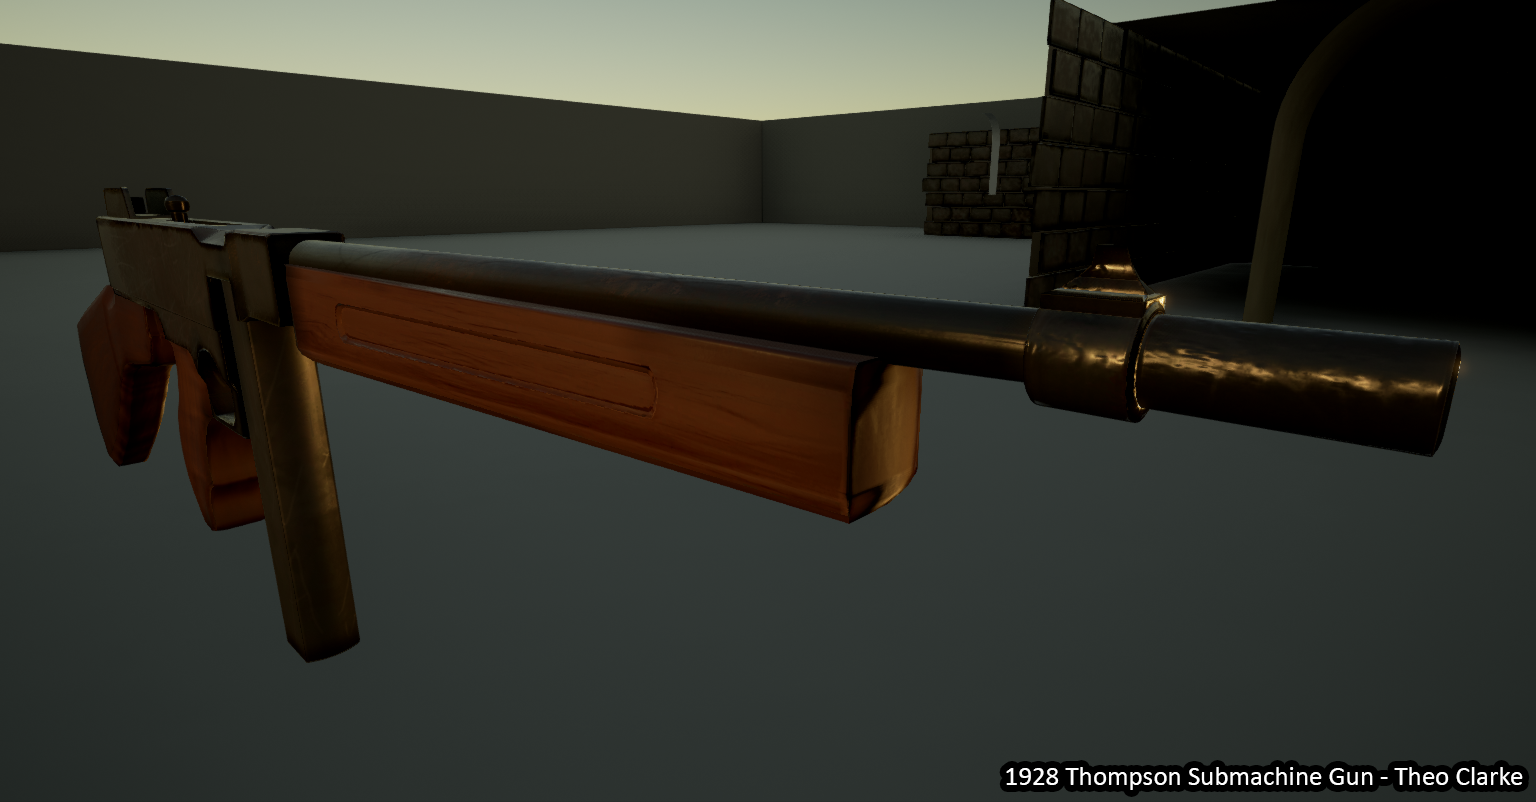
The environment will consist of a small basement room with chunky bare-brick walls and arches, a bar and a stage. It will have dim, atmospheric lighting and will be filled with detail items like barrels, bottles, tommy guns and jazz instruments to give it an authentic 1920's speakeasy feel.

Over the course of this project, I will be using the following software:
  • Google Sketchup to create a 3D plan of the scene.
  • Autodesk Maya to model all of the assets.
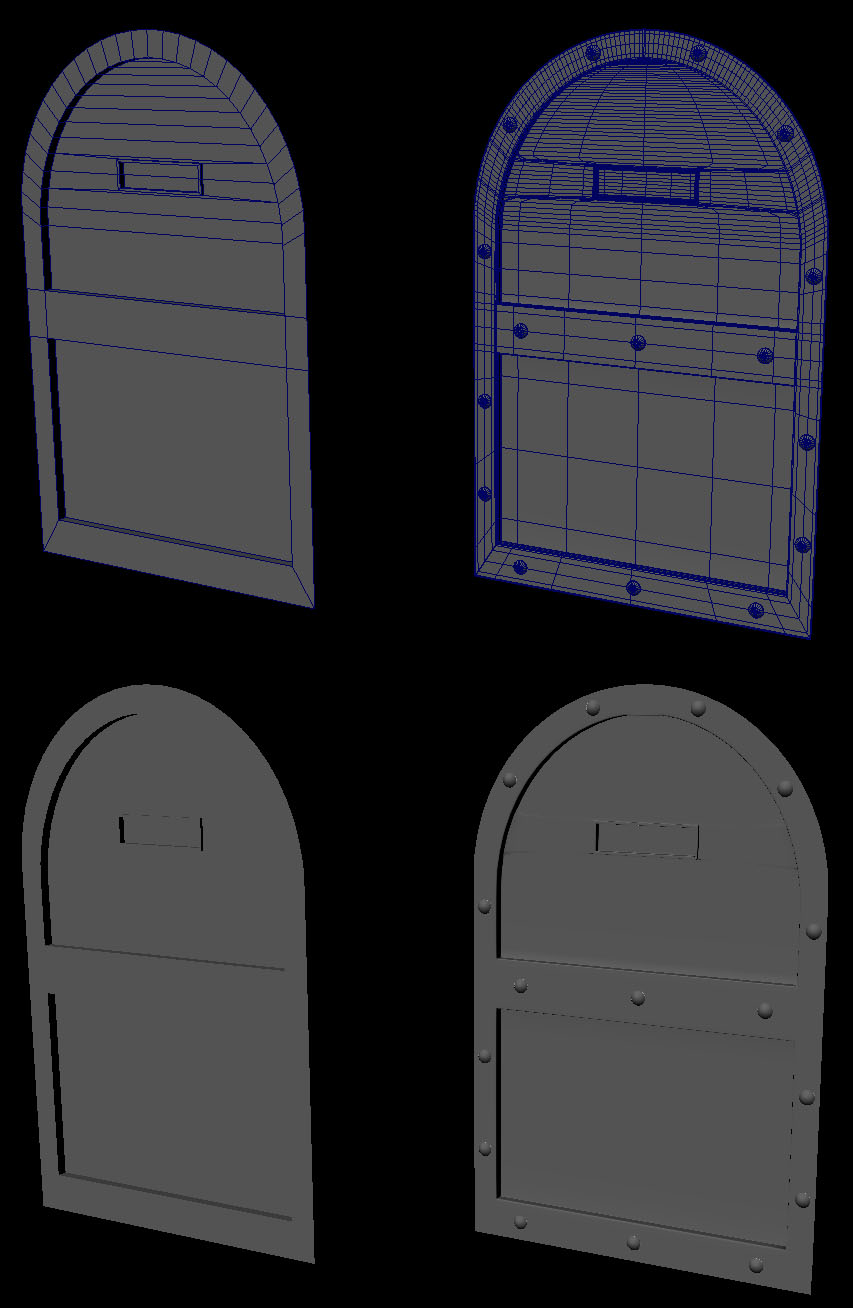
  • Autodesk Mudbox for sculpting/advanced normal map creation.
  • Adobe Photoshop to texture the assets.
  • Unreal Engine 4 to build and render the scene.
The scene will be fully PBR-textured and I will be working with generous polycount limits.


My next step is to start modelling the basic shape and architecture of the room in Maya.

Sunday, 28 February 2016

PBR Baseball Bat Model Finished

Last week I made a blog post about a baseball bat 3D model that I'd started working on. The model is now finished and I've created a few presentation shots to show it off. This has been a fairly simple project just to get myself back into practice and I now feel more motivated to do some more 3D work soon, which is good!

Here's the finished model:


Staye tuned for more 3D projects coming soon!

Friday, 19 February 2016

PBR Baseball Bat - 3D Modelling Project

This month I've been working on a new 3D modelling project to get myself back into practice, and as a way of teaching myself how to use Maya 2016. It's been a while since my last 3D model as I've been focusing mainly on creating browser games, so it felt like it was time I started another 3D project.

I'm modelling a PBR-textured medium-polycount baseball bat. It's a fairly straightforward model, so the texture will be the real element that I need to get right. This factor is what I was looking for when deciding on what to model, because it means I will be able to hone my skill with PBR texturing - an important skill for an aspiring modeller/environment artist to have.

As it stands now, the model is finished and mapped, and the textures are also quite developed, I'm just working on getting the PBR material just right before I can call it finished!


Here's some pictures of the work-in-progress model:


Sunday, 31 May 2015

Diner In The Desert - Final Submission!

Diner In The Desert

At long last my honours project is finished! I'm really happy with how it's turned out overall. This is only the 2nd scene I've made using UE4 and PBR texturing (the first being my Throne Room for the Polycount/Allegorithmic contest) and I feel like I've learned a lot.

Here's some pictures of the final scene...


...and a video!


Thanks for reading!